Armitage Scanning
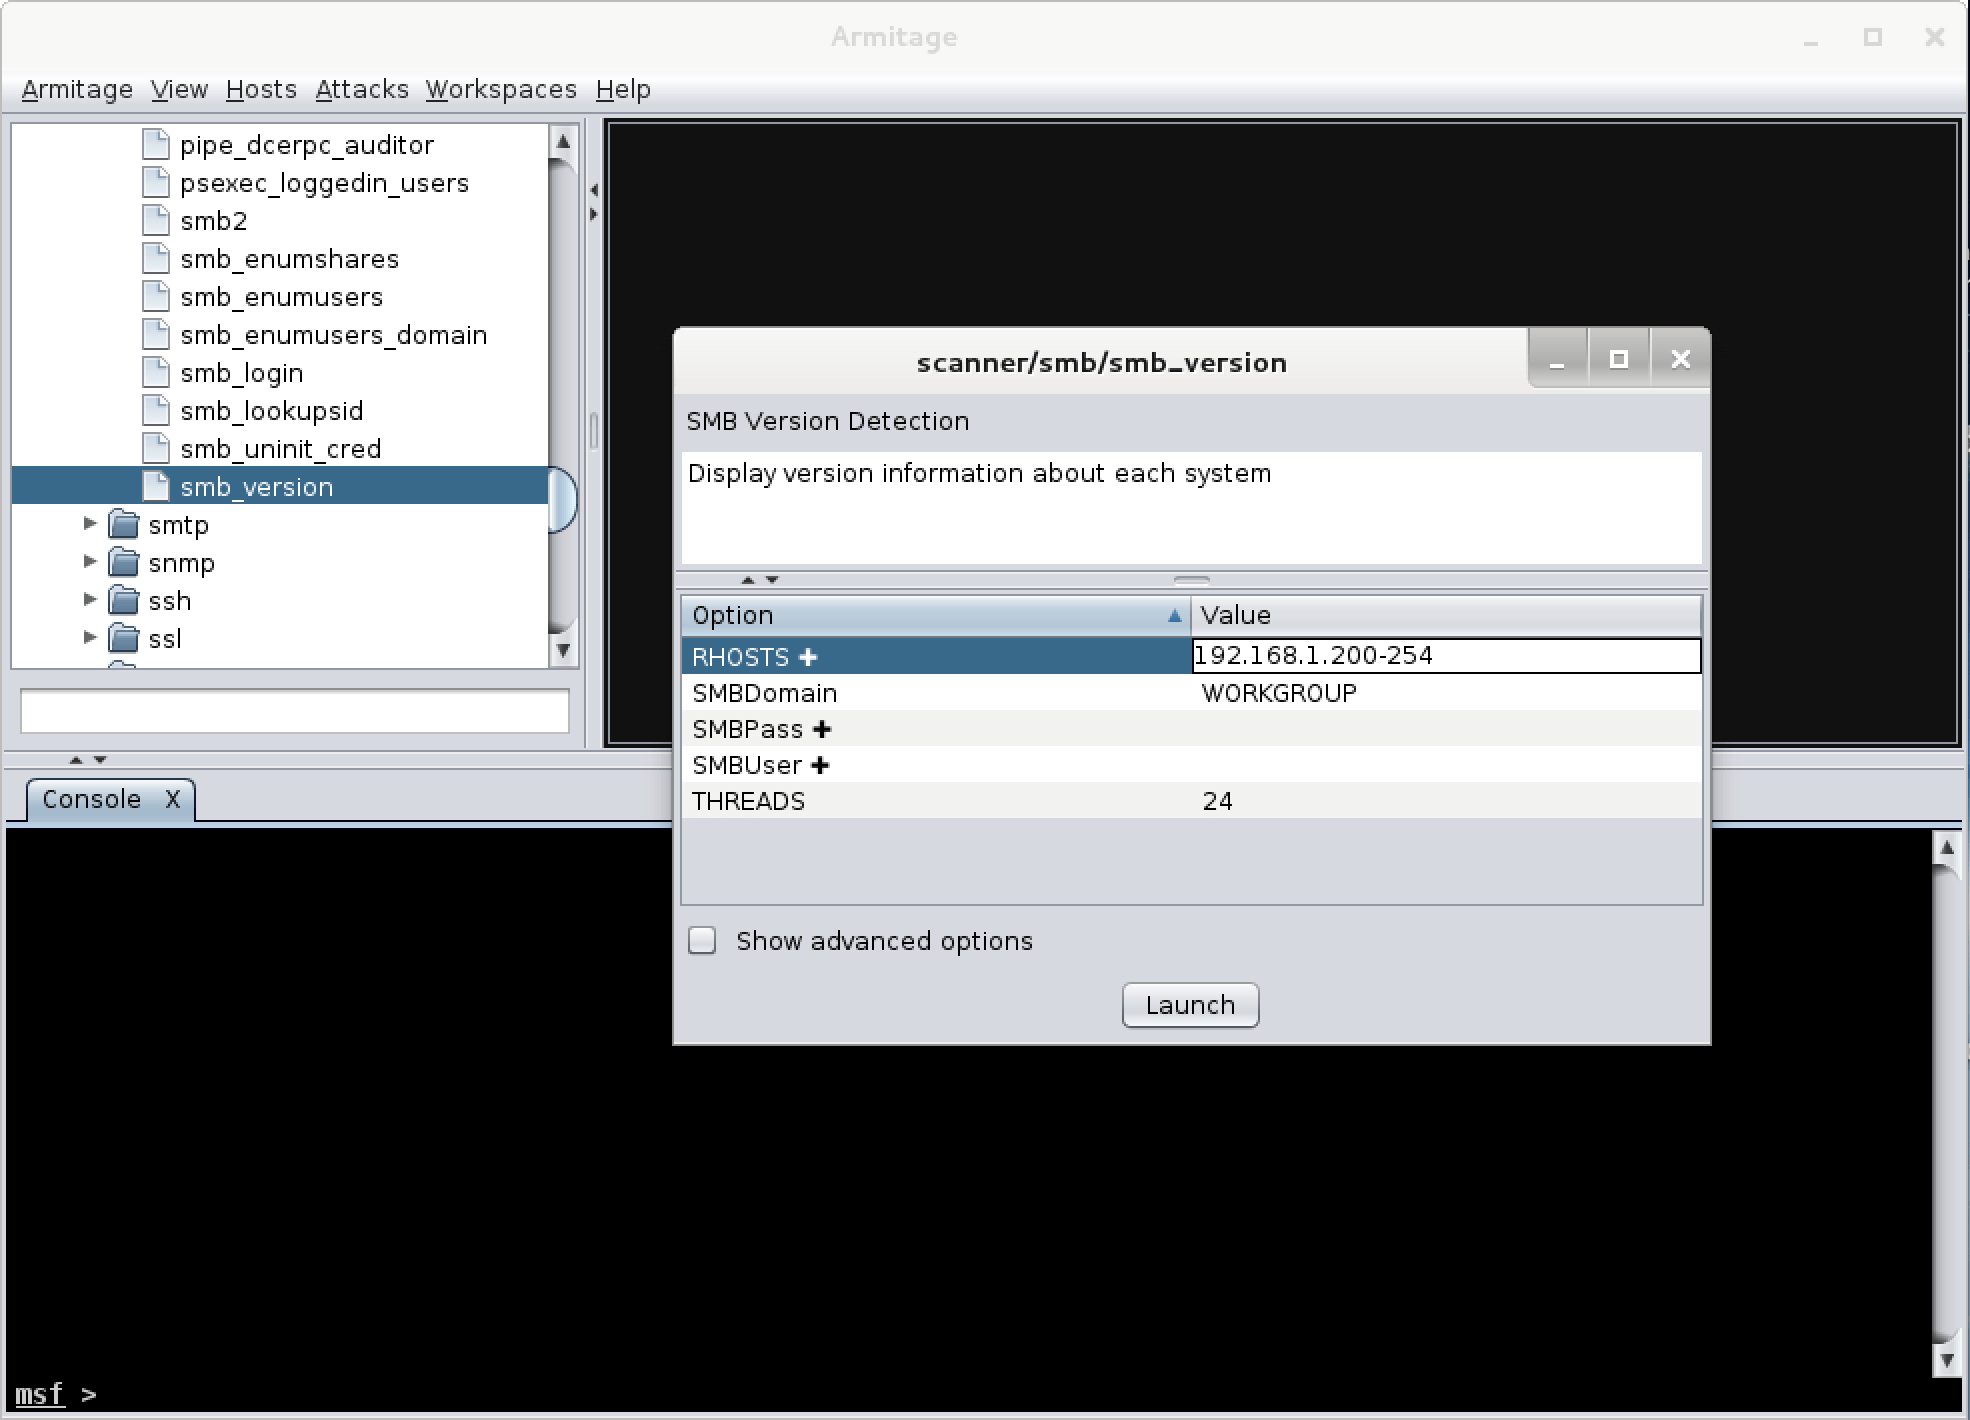
a11y.text Armitage ScanningTo select a scan we wish to run with Armitage, we expand the module tree and double-click on the scanner we wish to use, in this case, smb_version, and set our RHOSTS target range.
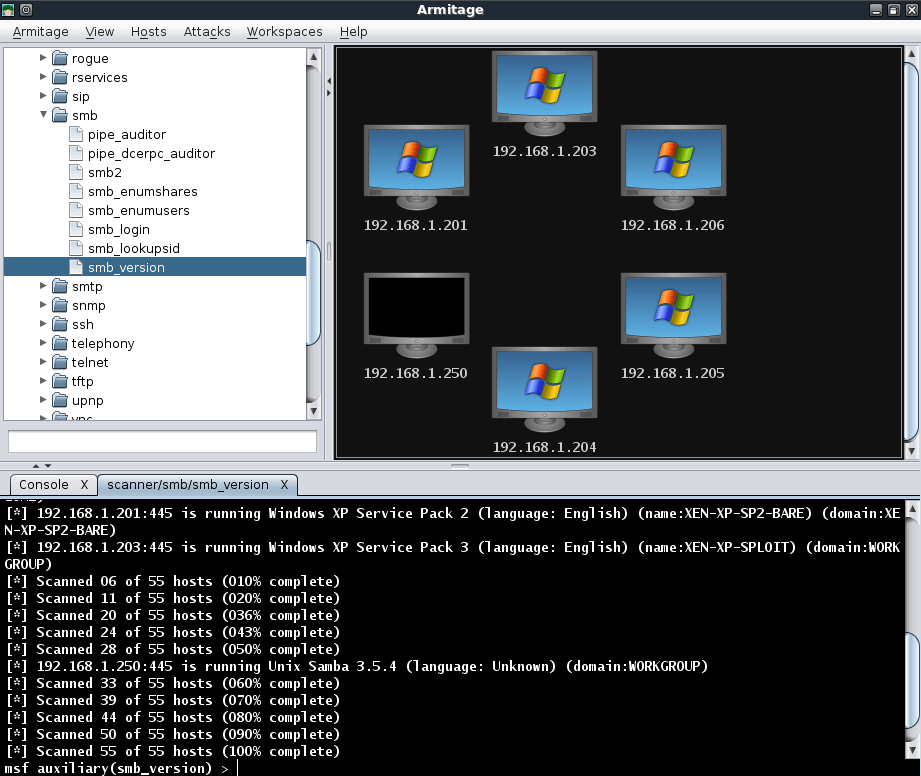
After clicking ‘Launch’, we wait a brief amount of time for the scan to complete and are presented with the hosts that were detected. The graphics on the hosts indicate that there are either WinXP or Server 2003 targets.
If there are any hosts we don’t wish to target, they can be removed by right-clicking on a host, expanding the ‘Host’ menu, and selecting ‘Remove Host’.
We see in our scan results that there are two Server 2003 targets so we can select just those two and perform additional scanning on them. Notice that Armitage automatically sets the RHOSTS value based on our selection.
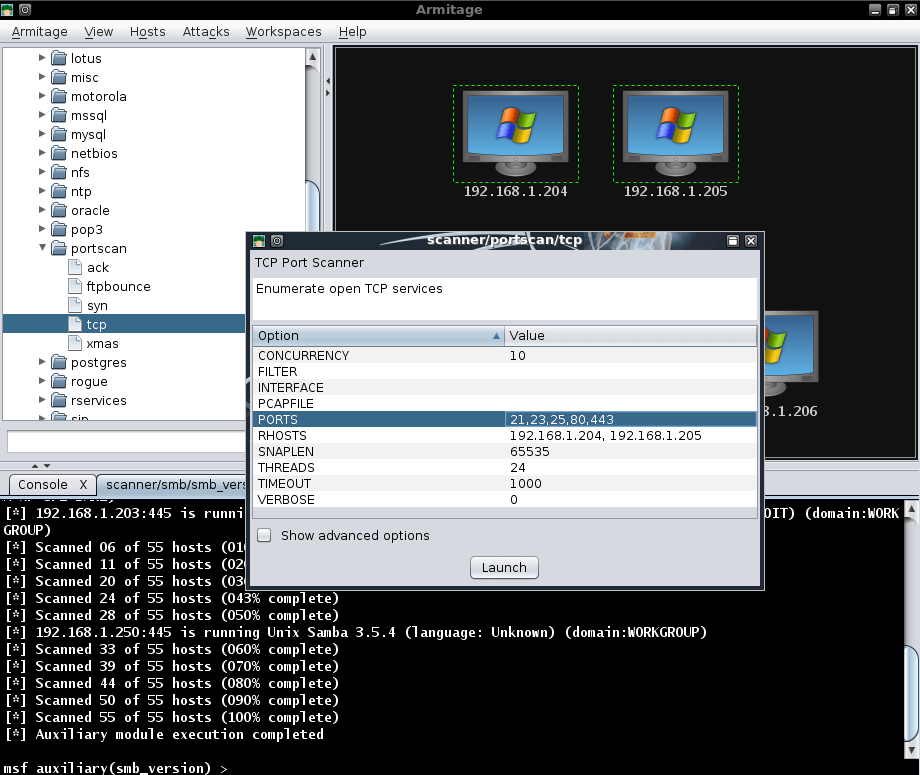
Right-clicking on a host and selecting ‘Services’ will open a new tab displaying all of the services that have been scanned on the target system.

Even with these brief scans, we can see that we have gathered quite a bit of information about our targets that is presented to us in a very friendly fashion. Additionally, all of the gathered information is also conveniently stored for us in the MYSQL database.
mysql> use msf3;
Reading table information for completion of table and column names
You can turn off this feature to get a quicker startup with -A

Database changed
mysql> select address,os_flavor from hosts;
+---------------+-----------------+
| address       | os_flavor       |
+---------------+-----------------+
| 192.168.1.205 | Windows 2003 R2 |
| 192.168.1.204 | Windows 2003 R2 |
| 192.168.1.206 | Windows XP      |
| 192.168.1.201 | Windows XP      |
| 192.168.1.203 | Windows XP      |
+---------------+-----------------+
5 rows in set (0.00 sec)

mysql>