The Peensy – Advanced Penetration Testing Payloads

In one of our recent engagements, we had the opportunity to test the physical security of an organization. This assessment presented an excellent scenario for a USB HID attack, where an attacker would stealthily sneak into a server room, and connect a malicious USB device to a server with logged on console, thus compromising it. From here, the “Peensy” (Penetration Testing Teensy?) was born. The impatient can find the video demo below.
Previous work
There has been a significant amount of previous talk about using the Teensy device to emulate PC keyboards, as well as various methods of delivering malicious payloads to computers from the Teensy. Most notably, there are IronGeeks PHUKD library, SET Teensy payloads, and Kautilya. By cannibalizing code and ideas from various projects and web resources, we were able to improve and refine our Peensy payload to suit our needs.
Design Goals
Our goal was to make a custom, “uber” Teensy, which would provide dynamic and reliable functionality in the field. The Teensy would target Windows machines only (in our case, Windows 2008 servers), and should be able to cope with variables such as the architecture of the machine being attacked, whether UAC should be bypassed or not, etc. The device should also be able to cope with advanced and complex payloads, while still retaining a small form factor.
Building the hardware

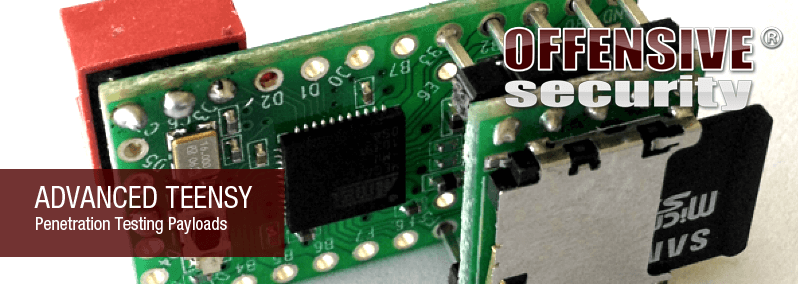
The hardware required for this project is readily available through pjrc.com and amazon. In order to meet our design goals, we realized we would need to add an SD card reader to the teensy, as well as add a DIP switch, which would allow us to configure basic payload settings before plugging in the Teensy into a victim computer an initiating an attack.
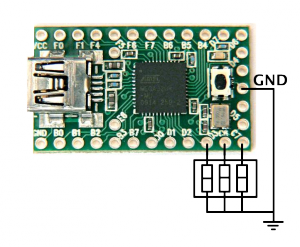
The SD card and DIP switch mount nicely on the Teensy, with no extra wiring needed. The DIP switch needs to be grounded on one side, which was achieved by cutting off two pins from the one side, and connecting them with the last pin, which ends up in the Teensy ground. The SD card can be connected easily, as shown on the PJRC site.
Payload Design
The basic functionality of our Teensy payload is to act as a “Trojan Dropper” for Windows based machines. We needed to address these goals specifically:
- Reliable deployment of the payload. Leave little to chance.
- The payload should be persistent and survive reboots.
- Should use little to no foreign executables on the victim machine.
- Should be able to cope with different Windows architectures and versions.
Payload reliability – Execution and Deployment
This is probably one of the most challenging aspects of the design. The Teesny has little support for input (NumLock, ScrollLock, CapsLock Leds) – making it harder to know if a specific operation has succeeded or not. For example, once we plug in the Teensy to a victim machine, how can it know when Windows has initialized the required drivers and is ready to accept keystrokes from it? Another good example would be opening a Windows command prompt through the Teensy – which requires a sequence of keyboard commands, timed in a certain manner. If for some reason this sequence were to be interfered with or some other mishap should occur – the Teensy keyboard commands would go out of context and probably not produce our required results.
Initial Windows Initialization of the Teensy
An elegant solution for figuring out when the Windows drivers are initialized and ready was found in a code snippet we found floating on the interwebz. Once the Teensy is plugged in, this function will continuously check to see if the Keyboard is reacting to a “Num Lock” key press (by checking if the corresponding Led lights up). Once the Teensy senses a reaction, it can then continue sending keyboards commands safely.
{
bool numLockTrap = is_num_on();
while(numLockTrap == is_num_on())
{
blink_fast(5,80);
press_numlock();
unpress_key();
delay(speed);
}
press_numlock();
unpress_key();
delay(speed);
}
void unpress_key(void)
{
Keyboard.set_modifier(0);
Keyboard.set_key1(0);
Keyboard.send_now();
delay(500);
}
Successful command feedback
Opening a Windows command prompt is the foundation for all our attacks. Without this functionality, we are very limited in our payload deployment. For this reason, we need a feedback mechanism to know whether a command prompt was opened successfully and provide some “error correction” to the Teensy. One solution for this (derived from the code above) is to have Windows programmatically press num/scroll/caps keys once a command is successful – allowing the Teensy to then sense the num/scroll/caps LEDs, and make the appropriate conclusions. The following pseudo code provides an example for attempting to open a command prompt, while accepting feedback on a successful event.
{
make_sure_numlock_is_off();
... initialise SD card, DIP switches
... open a command prompt
... write a vbscipt that turns on numlock and execute it.
check_for_numlock_sucess_teensy(reps,millisecs);
}
// loop (repeat) times for (speed) milliseconds
bool check_for_numlock_sucess_teensy(int reps, int millisecs)
{
int i = 0;
do
{
delay(millisecs);
if (is_num_on())
{
make_sure_numlock_is_off();
delay(700);
return true;
}
i++;
} while (!is_num_on() && (i>reps));
return false;
}
This feedback mechanism can be extended to other functionalities, such as downloading files, checking for internet connectivity, checking OS and CPU architecture or running other commands which take an unpredictable amount of time. For example, we might want to know if the target Windows machine has powershell installed:
{
bool success;
make_sure_numlock_is_off();
Keyboard.println("powershell");
delay(1000);
Keyboard.println("$wsh = New-Object -ComObject WScript.Shell;$wsh.SendKeys('{NUMLOCK}')"); // "press numlock via powershell"
delay(200);
success=check_for_numlock_sucess_teensy(reps,millisecs);
if (success) // if powershell is available we want to exit the PS prompt (but not the CMD prompt).
{
Keyboard.println("exit");
}
return success;
}
Video Demo
Finally, a quick video demonstration of the “Penetration Testing Teensy Payload” is in order. In the following video, we intentionally disrupted the execution flow of the keyboard commands, to see if the Teensy would “auto correct” itself. Best viewed in full screen. Alternatively, you can download the movie too.
Peensy code
Note: We did *not* extend functionality for “non powershell enabled machines” (XP, etc), however this can be added easily. We’ve released a sample sketch which contains several useful functions, as well as a skeleton demonstrating the use of the Peensy features. For those who do not care for the SD and DIP switch – we’ve also added a “stand-alone” payload which will work perfectly on a bare Teensy. We have tried to keep the code as simple and as readable as possible. You can download the Peensy sketch and utility tools from github – comments are in the code:
Future work
This code is presented as a rough proof of concept for more reliable payload delivery with a Teensy. Command delays are over exaggerated and not optimized, and no attempts are made to hide the process from the screen. There are many possible improvements that can be made to this whole process, as well as additional features. One of the interesting feature we have not yet added to this version of Peensy is a simple, optimized communication protocol between the Teensy and victim computer using the keyboard LEDs. We will introduce this feature in future code updates.

